📆 last updated: January 12th 2022
🔎IMPORTANT! In order to create a Cart Abandonment email you will need:
Prerequisite Work
- A Zapier account
- A Gmail account
- A Web Shop Manager subscription at the Grow plan or above
- A Web Shop Manager Universal API key
- Create a Test Order in Building Status
Creating a Cart Abandonment Zap
- Action 1: Create a Trigger
- Action 2: Set the Delay
- Action 3: Find Order
- Action 4: Filter Out Orders No Longer in Building
- Action 5: Run Python
- Action 6: Create the Abandoned Cart Email
Prerequisite Work
Before creating your Zap, we need to first set up a few prerequisites. Here is a list of things you'll need:
- A Zapier account
- A Gmail account
- A Web Shop Manager subscription at the Grow plan or above
- A Web Shop Manager Universal API key
- Create a Test Order in Building Status
Creating a Test Order in Building Status
This is a small but important step. By using your email address to create an order in building status, you will be able to test and see the cart abandonment email your customers will receive. Is this step 100% necessary? No. You COULD set up the cart abandonment emails without ever seeing the end result. But setting up this test order will make the process 100x easier and you'll be able to test your work as you go. Plus, setting up the test order takes less time than it took you to read this paragraph. The instructional video below is less than three minutes long and walks you through the steps of setting up and confirming a test order.
Creating a Cart Abandonment Zap
Action 1: Create a Trigger
A trigger is a task that will poll WSM looking for information. The trigger will poll WSM for orders in a specific Order Status. For Cart Abandonment, we’re looking for orders with an Order Status of “Building”.
- Do you need to add your site to Zapier?
- Click the Connect a new account button

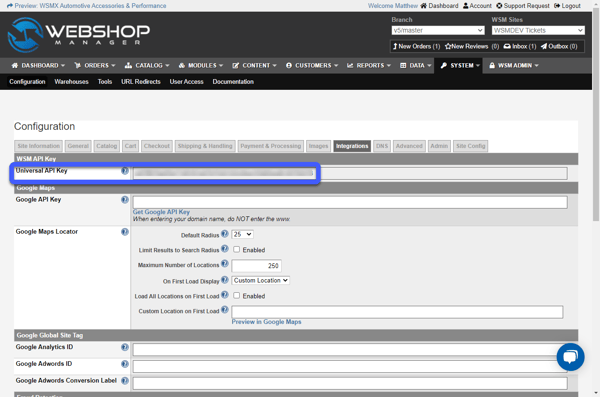
- In the Zapier pop up, enter your site's FULL URL & WSM Universal API key. (Your API key is found in the System → Configuration → Integrations menu of your site)
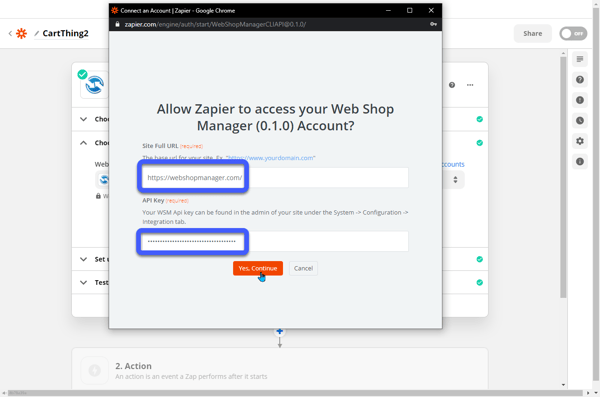
- Click the Connect a new account button
Action 2: Set the Delay
Why are we setting a delay? Every time one of your customers takes a product to the Checkout, an order is created with an Order Status of "Building". When your customer completes a transaction and clicks the Submit Order button, the Order Status is updated from Building → New. You don't want Abandoned Cart emails getting sent out to customers still in the checkout process! This delay is going to pause the Zap and prevent emails from being sent to customers that have completed checkout.
Action 3: Find Order
Now that you've set the delay, you will need to find the order again to make sure that it is still in Building status & has not already been completed. This is done by having Zapier search for the Order ID from step 1, the Trigger.
Action 4: Filter Out Orders No Longer in Building
Just a quick recap on order functionality. Any time your customer adds a product to the cart and proceeds to checkout, the system generates an order in Building status. When your customer completes the transaction, the order status is updated from Building → New. In this Action, we are going to remove the orders that were updated from Building → New. Don't want to send a cart abandonment email to customers who completed the purchase!
Action 5: Run Python
In this step we are going to use a coding language called Python to group the product data & and grab your customer's first name. This will help you add the product titles & images to the body of your Cart Abandonment emails and personalize the emails using your customers' names.
Here is the code snippet you will be adding to your Zap in the video below.
names = input_data.get('name').split(',')
images = input_data.get('image').split(',')

items = ""

for i in range(len(images)):
    items += '<b>{}</b><br>'.format(names[i])
    items += '<img src="{}"><br>'.format(images[i])

first = input_data.get('customer').split(' ')[0]

return {"items": items, "first": first}
Action 6: Create the Abandoned Cart Email
Now we have everything prepped to send out cart abandonment emails. All that's left is to construct the emails. We are going to be creating an HTML email, so you will need to add a small amount of styling to the email so it is structured in an easy to read format. The <br> tag is going to be your best friend for this! See how these <br> tags are used in the video below.
Still have questions? Reach out to the WSM Support Team for further assistance!