Skip ahead to
- Paypal Use for International Payments
- Refunding Cancelled orders
- PCI (Payment Card Industry)
-
Exporting Sales Tax Data by State
Paypal Express Checkout Activation
Q: How do I enable PayPal Express Checkout?
A: First, you must activate Paypal Express Checkout on your site and and add the require credentials.
Paypal Express may require an activation fee. Contact your Customer Experience specialist at 619-278-0871 or support@wdsolutions.com to confirm if an activation fee applies and to request activation. Once confirmed and activated, you can then enable Paypal Express live on your site as follows:
-
In Web Shop Manager, hover over System.
-
Click Configuration.
-
Select the Payment & Processing tab.
-
Check PayPal Express.
-
After performing the steps below add the appropriate information to the System > Configuration > Payment & Processing fields.
-
Click Save Changes.
How to find PayPal Express Information
- Login into your PayPal account.
- Click on Profile and settings.
- My selling tools.
- API access > Update.
- NVP/SOAP API integration (Classic) > Manage API Credentials.
- Request API signature (default) > Agree and submit.
- API Username > Show.
- API Password > Show.
- Signature > Show.
How do I create a secondary user in PayPal Manager?
If you are a Payflow Pro user, we strongly recommended that you create a secondary user in PayPal Manager for integration purposes. This will help maintain your integration if you ever need to change your primary PayPal Manager password.
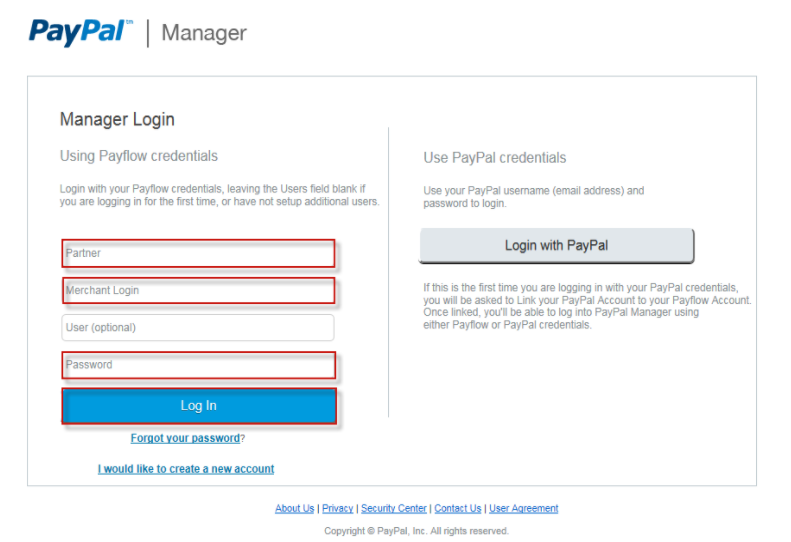
- Click here to log in to PayPal Manager.
- Enter your Partner, Merchant Login and Password information, and then click Log In.
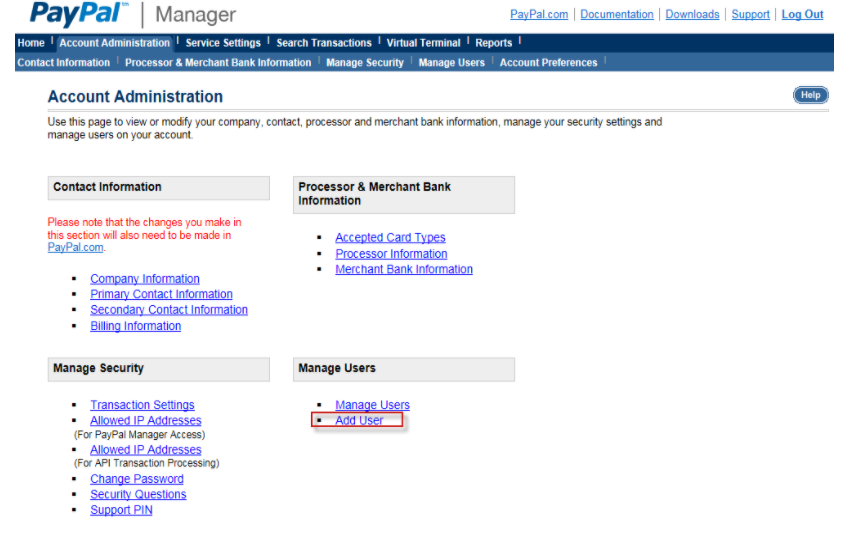
- Click Account Administration.

- Under Manage Users, click Add User.
- Enter all required information:
- Admin User Password: Enter the password for your primary PayPal Manager login.
- Contact Name Email: Enter your contact name and email. The Phone field is not required and can be left blank. These fields will not be seen by your buyers.
- User Login Name: Enter a user account name, usually for a cart integration or restricted employee account. The name must contain at least 7 alphanumeric characters.
- User Password: Enter a password for the user account. Use a different value than your Admin User Password. The password must contain at least 7 alphanumeric characters.
- Predefined Role: Specify a privilege level, which varies based on the type of user you are creating. For shopping cart purposes, select API_FULL_TRANSACTIONS to ensure that the user is only able to submit API transaction requests, and is not able to log in to the PayPal Manager.
- User Status: Select Active.
- View Bills (may not appear depending on the account type); Select Yes if the user needs to view monthly invoices/bills; otherwise, select No.
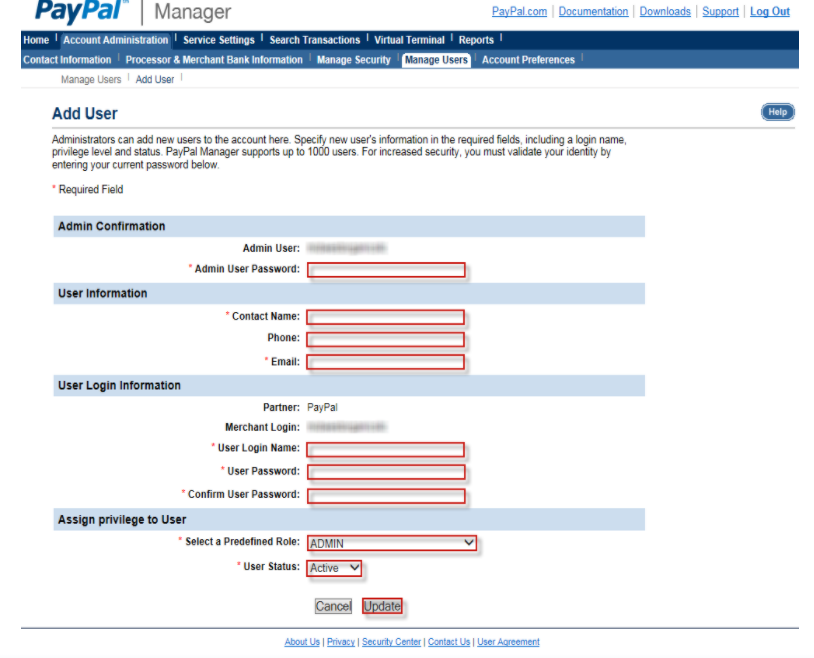
- Click Update.
To see the original steps or any additional information from PayPal; visit https://www.paypal-knowledge.com/infocenter/index?page=content&id=FAQ1818&expand=true&locale=en_US
Adding to WSM
- Log into the back end of your website
- Hover over System
- Click on Configuration
- Click on the gray tab PayPal & Processing
- In Payment Options section select Credit (PayPal Pro)

- Once you click on that you will see fields open up and the information that you collected above, use to fill in.

- Click Save Changes on the far right.
PayPal Pro Account
Q: Can a PayPal Pro account also be used for PayPal Express Checkout?
A: Yes, if you have an established/approved PayPal PRO account, it will cover Express Checkout transactions.
- Approval: The PayPal PRO account takes an extra measure of approval by our Finance Dept. Once complete, you will be approved for PRO 2.0 and Virtual Terminal 2.0.
- Upgrading: If you have a PayPal Standard account, you can upgrade to PayPal PRO. You will need to apply separately either on our website, or through PayPal directly. Go here to apply for a PayPal PRO account: https://registration.paypal.com/onboardingPage.do?bundleType=C3&country=US&partner=PayPal
How do I restrict International Payments to PayPal?
Q: How do I restrict my international credit card transactions to use PayPal only?
A: The best way to restrict your payment method for international orders to PayPal is to not offer options for them to pay through your regular merchant account. You can do this by changing your settings with your Payment Gateway. Below are the steps to complete the setting if your payment gateway is Authorize.net
-
Log into http://authorize.net
-
Click the Account tab
-
Click Settings
-
Click Address Verification Service
-
Check the checkboxes: B,E,R,G,U,S, and N
-
Click Submit
View Authorize.net's Merchant Guide: http://www.authorize.net/support/merchant_guide.pdf, starting on page 22 for details on B,E,R,G,U,S, and N.
We then recommend that you place information on your cart screen to notify your International Customers to select PayPal.
Refunding Cancelled Orders
Q: If I cancel an order will it cancel the PayPal charge?
A: Not in Web Shop Manager (WSM), because the Order Status does not change any payment information. Payments need to be adjusted separately.
With PayPal Express, yes, you need to log into PayPal and perform the cancellation yourself.
For Authorize.net, Sage Payment Solution or PayPal Pro you can edit the payment in WSM when you are performing a full refund. If you are doing a partial refund you will have to complete this on your Authorize.net, Sage Payment Solution or PayPal Pro account.
Instructions for CC Full Refund:
- Log into WSM Admin, http://webshopmanager.com/admin
- Click Orders
- Search and find the order you want to edit.
- Scroll down to the payment information section.
- To the far right of the payment line you will see an icon with a piece of paper and pencil (edit icon), Click this Edit icon.
- Confirm Refund appears in the drop-down.
- If you do not want the customer to receive an email uncheck the box at the bottom of the order screen for "Email this customer an update notification."
- Click Update Order.
- Once the refund is confirmed you can change the order status to Canceled and email the customer
Instructions for PayPal Refund:
You can send refunds within 60 days of receiving a payment. Refunds are available only for transactions involving the purchase of goods and services. You can send a full or partial refund. When you issue a full refund, your original transaction fee is credited back to you minus a thirty cent processing fee. When issuing partial refunds, a portion of the fee is returned to you.
- Log into your PayPal account
- Click the History subtab.
- Find the purchase payment you would like to refund and click Details.
- Click the Issue Refund link.
- Enter the refund amount and click Submit.
- Confirm the amount and click Submit.
- Once the refund is confirmed you can change the order status to Canceled and email the customer
PCI (Payment Card Industry)
PCI Compliance Forms
Q: Can you help with PCI Compliance Forms?
A: No. Unfortunately, we are legally unable to do this for you. Most of the questions will be regarding your own local, on-site storage of critical data.
🔎Note: Also, so you know, we do not store credit card information within Web Shop Manager.
Multiple Checkout Attempts
Q: What can I do to prevent 100s of attempts at checkout?
A: There are several things you can do to help credit card scammers from attempting to checkout over, and over again.
- In Authorize.net you can determine the IP address that continues to attempt to checkout. You can then block that particular IP address. It is very possible that they will try with another IP address.
- You can work with Authorize.net to limit the number of transactions that someone can attempt to place in a day.
- Within WSM you can set the message that is displayed at checkout when a card is declined by Authorize.net. Instead of the message giving them more details about what the issue is with the card, you can use a custom message that will override the message sent from Authorize.net.
- To update the message that is displayed, navigate on the backend of your site to
- Hover over System drop down.
- Select Configuration.
- Select the Payment & Processing tab, look for the field "Authorize.net Custom Decline Message" add your desired message.
- Click the SAVE CHANGES on the bottom right hand side.
Exporting Sales Tax Data by State
Q: How do I find out how much my site has collected in sales tax? How do I find out the sales tax collected by state?
A: The Export CSV tool found on your Order List is the easiest way to extract the sales tax data on your site. You can even separate that information by date & by state.
Watch the quick tutorial video below to learn how!