📆 Last Updated 3/31/2022
🕒 Time to complete task: 2-5 minutes
These instructions only apply to sites using either PartsLogic or WSM's Non-AGS search. Websites that are using WSM's AGS search require additional setup.
Setup Site Search
Site Search must be set up for each reporting view where you want to see your customers' search activity.
To set up Site Search for a view:
- Sign in to your Analytics account.
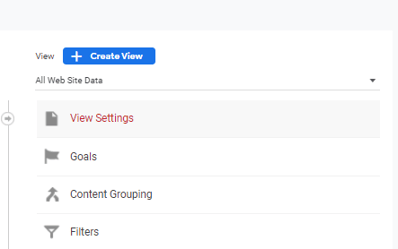
- Click Admin, and navigate to the view in which you want to set up Site Search.

- In the View column, click View Settings.
- Under Site Search Settings, set Site Search Tracking to ON.
- In the Query Parameter field, enter the letter q,sq,fitment
- 🚫Do not enable Strip query parameters out of URL
- 🚫Do not enable Site search categories.
- When done hit the [Save] button.
![]()
Author Annotation
It's helpful to make annotations when you make changes to either your website or your Google Analytics' settings. Annotations are just a way to document these changes. An annotation recording when site search was enabled in Google Analytics is important when analyzing your analytics reports to identify changes in your customers' trends and behaviors.
See this article to learn more about annotations.
Author the annotation:
- Create a new annotation with the following info:
- Date: enter in the date of when site search tracking was enabled
- Text: Site search tracking enabled
- Click the [Create Annotation] button and you're done!
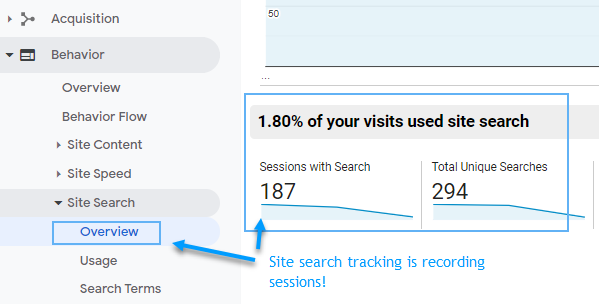
Verify Site Search Tracking
Always test to confirm site search tracking is setup properly and recording your customers' sessions.
- Sign in to your Analytics account.
- Navigate to Behavior > Site Search > Overview.
- Site search is tracking sessions if you see data in the overview report.